00 - How to login to Maxwell
The DESY has a quite powerful compute cluster called the Maxwell cluster. The documentation can be found here https://confluence.desy.de/display/MXW/Maxwell+Cluster, however as this can be confusing sometimes, we will try to condensate this to a step by step manual.
- Getting a DESY Account
- Using the Cluster
Getting a DESY Account
During you beamtime you will encounter multiple systems, where you will need two different types of accounts:
The DOOR Account
Before you arrive you have to create a DOOR account and do all the safety trainings. This account is also being used for the gamma-portal, where you can manage you beamtime data, grant access to other users and manage FTP access. However this account does not work with other resources. For this you will have to request a second account:
The PSX Account
If you decide during a beamtime, you want to have access to the cluster, tell your local contact so, and they will request a PSX account for you. With this you will get access to the Kerberos, Windows and afs resources at DESY, which includes the cluster.
After you got the account, you have to change the initial password within 6 days. For this, go to https://passwd.desy.de/ and log in with your user name and initial password (you do not need any OTP when you sign in for the first time). Then agree to the terms and change your password.
Using the Cluster
Structure of the Cluster
Overview
The Maxwell Cluster has (status 2021) more than 750 nodes in it. To organize this, you cannot access any node directly, but you have to request compute resources at first. You then can connect form an entrance node to you compute node
Entrance Nodes
If you have successfully obtained an PSX account you can get started. The entrance node are:
https://max-display.desy.de:3389/auth/ssh (in any case)
These nodes are not for processing, as you will share them with many other users. So please do not do anything computational intensive on them, like reconstruction or visualization. Viewing images is ok.
Fast X3
The cluster uses the software FastX3 for connection and virtual desktop. To get the right version of this, use the web interface, log in, and in the bottom right corner is a download link for the desktop client. The version has to match exactly to work properly.
If you want to add a connection in the desktop client, click the plus, select web, use the address above (including the port), and your username and force ssh authentication. Then you can choose if you want a virtual desktop (XFCE) or a terminal.
Partitions
Starting from an entrance node, you can connect to a compute node. As there are multiple levels of priorities etc. the nodes are organizes in partitions. You can only access some of these. To view which one, open a terminal and use the commad:
Your result will look something like this:

SLURM
The access to the resources of the cluster is managed via a scheduler, SLURM.
SLURM schedules the access to nodes and can revokes access if higher priority jobs come.
PSX Partition
Here you cannot be kicked out of your allocation. However, only few nodes are in this partition and you can also only allocate few in parallel (2021: 5). Some of them have GPUs available.
All Partition
Very large number of nodes available and you can allocate many in parallel (2021: 100). However each allocation can be revoked without a warning if s.o. with higher priority comes. This is very common to happen. If you want to use this partition, be sure to design your job accordingly. Only CPU nodes.
Allgpu Partition
Like all, but with GPUs
Jhub Partition
For Jupyter Hub
Connecting to the Cluster
Connect to an entrance node via FastX. You will automatically be assigned to a node when you start a session via a load balancer (max-display001-003, max-nova001-002)
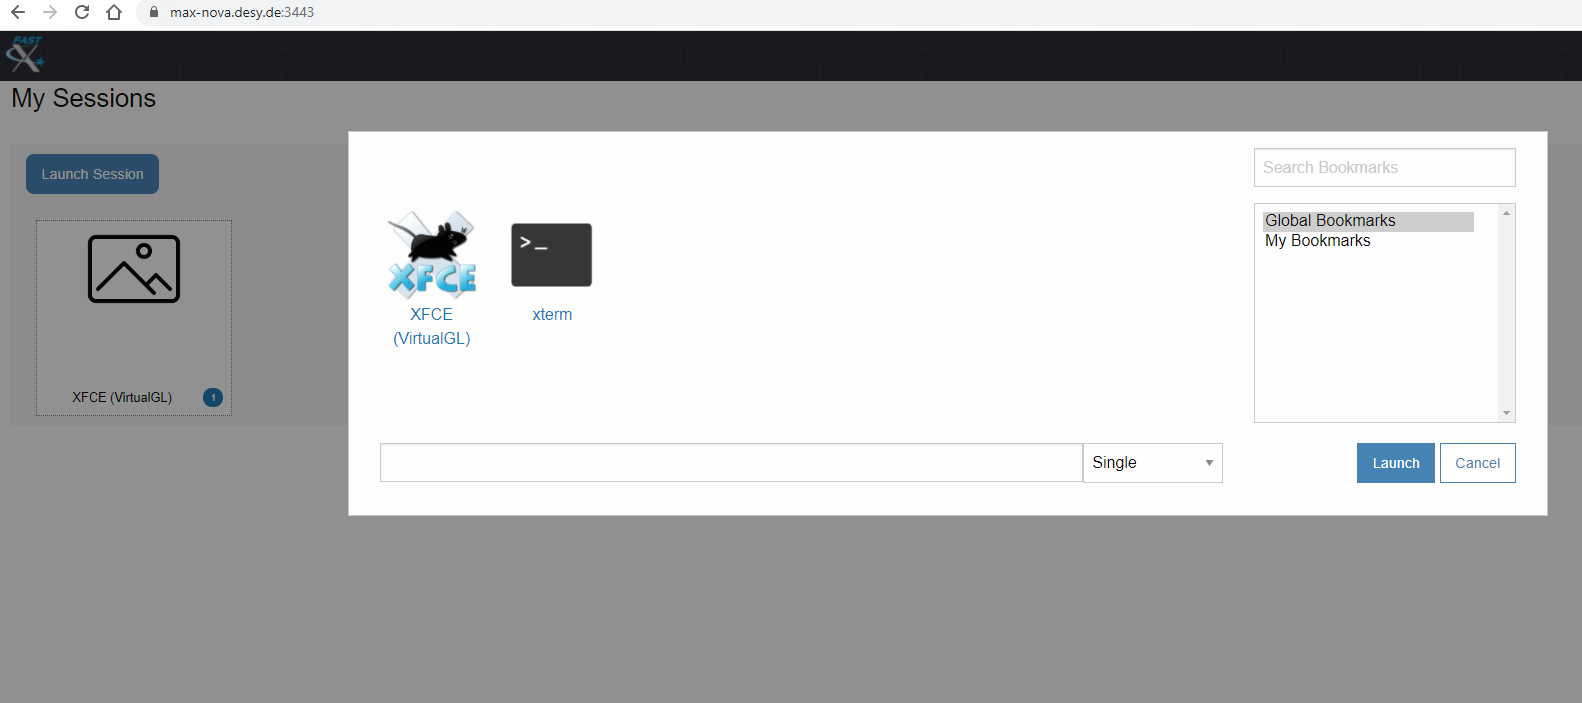
Choose a graphic interface and look around.
Data Storage
The Maxwell cluster knows many storage systems. The most important are:
Your User Folder: This has a hard limit of 30 GB. Be sure not to exceed this.
The GPFS: here all the beamtime data are stored.
GPFS
Usually you can find you data at: /asap3/petra3/gpfs/<beamline>/<year>/data/<beamtime_id>
In there you will find a substructure:
- raw: raw measurement data. Only applicant and beamtime leader can write/delete there
- processed: for all processed data
- scratch_cc: scratch folder w/o backup
- shared: for everything else
The GPFS has regular snapshots. The whole capacity of this is huge (several PB)
How to Get a Compute Node
If you want to do some processing, there are two ways to start a job in SLURM:
- Interactive
- Batch
In both cases you are the only person working on the node, so use it as much as you like.
Starting an Interactive Job
To get a node you have to allocate one via SLURM e.g. use:
Looking at the individual options:
- salloc: specifies you want a live allocation
- -N 1: for one node
- -p psx: on the psx partition. You can also add multiple separated with a comma: -p psx,all
- -t 1-05:00:00: for the duration of 1 day and 5h
Other options could be: --mem=500GB with at least 500GB of memory,
if you need gpu: --constraint=P100
- ... see the SLURM documentation for more options
If your job is scheduled you see your assigned node and can connect via ssh to it. (in the rare case where you do not see anything use my-jobs to find out the host name).
Starting a batch job
For a batch job you need a small shell script describing what you want to do. You do not see the job directly, but the output is written to a log file (and results can be stored on disk)
With a batch job, you can also start an array job, where the same task is executed on multiple servers in parallel.
An example for such a script:
#SBATCH --time 0-01:00:00
#SBATCH --nodes 1
#SBATCH --partition all,ps
#SBATCH --array 1-80
#SBATCH --mem 250GB
#SBATCH --job-name ExampleScript
source /etc/profile.d/modules.sh
echo "SLURM_JOB_ID $SLURM_JOB_ID"
echo "SLURM_ARRAY_JOB_ID $SLURM_ARRAY_JOB_ID"
echo "SLURM_ARRAY_TASK_ID $SLURM_ARRAY_TASK_ID"
echo "SLURM_ARRAY_TASK_COUNT $SLURM_ARRAY_TASK_COUNT"
echo "SLURM_ARRAY_TASK_MAX $SLURM_ARRAY_TASK_MAX"
echo "SLURM_ARRAY_TASK_MIN $SLURM_ARRAY_TASK_MIN"
module load maxwell gcc/8.2
.local/bin/ipython3 --pylab=qt5 PathToYourScript/Script.py $SLURM_ARRAY_TASK_ID
exit
To run this use
Viewing you allocations
To view your pending or running allocations you can use:
or
my-jobs
What is realistic in terms of resources
To be fair, you will not get 100 nodes every time you want them. Especially during a user run, the machines are often quite busy. But if you design your scripts to be tolerant to sudden cancellation, it is still worth trying if you profit from massive parallelization.
If you want to do some small processing, use one of the psx nodes. This should work most of the time.
Granting Data Access to other Beamtimes
If you have to add other users to a past beamtime, this can be done via the gamma-portal (by PI, leader or beamline scientist). After adding the accounts, these people have to make sure to log off from all FastX sessions, etc. to update the permissions.